Importance of Mastering
Mastering is the crucial final step in music production that can make or break your track. It's the process that ensures your music sounds polished and professional, ready to be played on any platform. In this article, we'll explore the essentials of mastering, focusing on EDM genres like Techno and Tech House. We'll provide practical examples and recommend software to help you get started.
Objectives of Mastering
The main goals of mastering are to achieve sonic consistency, ensure compatibility across different playback systems, and enhance the overall impact of your music. Whether you're releasing your tracks on streaming platforms, playing them in clubs, or burning them to CDs, mastering is essential to make your music sound its best.

Understanding Mastering
What is Mastering?
Mastering is the final step in the audio production process, where the mixed track is enhanced to achieve a professional sound. This step involves a series of technical adjustments and enhancements to ensure the track sounds cohesive and well-balanced across all playback systems. Historically, mastering was done using analog equipment, but today, digital tools have made the process more accessible.
Difference Between Mixing and Mastering
Mixing and mastering are two distinct stages in music production. Mixing involves combining individual tracks (like drums, bass, vocals, etc.) into a single stereo track. This process includes adjusting levels, panning, EQ, and effects to create a balanced and coherent mix. Mastering, on the other hand, is applied to the final mixed track. It involves making subtle adjustments to ensure the track sounds polished and consistent. While mixing focuses on the elements within a track, mastering focuses on the overall sound.
Why Mastering is Crucial for Electronic Music
Mastering is particularly important for electronic music genres like EDM, Techno, and Tech House. These genres often rely on intricate sound design and powerful, dynamic ranges that need to be preserved and enhanced.
Proper mastering ensures that the energy and impact of the track are maintained across different listening environments, from club sound systems to headphones. Additionally, electronic music often requires precise control over low-end frequencies and stereo imaging, making the mastering process essential for achieving a professional sound.

Tools for Mastering
Popular Mastering Software
There are several powerful tools available for mastering, each with its unique features and benefits. Some of the most popular software for mastering include:
- iZotope Ozone: A comprehensive suite that offers a range of modules like EQ, compression, and limiting, designed specifically for mastering.
- FabFilter Pro-Q and Pro-L: Known for their intuitive interfaces and high-quality sound, these plugins are staples in many mastering setups.
- Waves Mastering Plugins: A collection of industry-standard tools that offer great flexibility and precision.
Hardware vs Software
In the world of mastering, both hardware and software have their advantages. Hardware units often provide a unique warmth and character that can be difficult to replicate with software. However, software plugins offer convenience, recallability, and a wide range of options at a fraction of the cost. For most beginners, starting with software is more practical and cost-effective.
Essential Plugins for Mastering
Certain plugins are essential for achieving a professional mastering result:
- Equalizers (EQ): For balancing frequencies and correcting tonal issues (e.g., FabFilter Pro-Q, iZotope Ozone EQ).
- Compressors: To control dynamics and add punch (e.g., Waves SSL Compressor, FabFilter Pro-C).
- Limiters: For maximizing loudness without distortion (e.g., FabFilter Pro-L, iZotope Ozone Maximizer).
- Stereo Imagers: To enhance the stereo field (e.g., iZotope Ozone Imager, Waves S1 Stereo Imager).

The Mastering Process
Preparing Your Mix for Mastering
Before mastering, it's crucial to ensure your mix is as polished as possible. Here are some key steps:
- Export with Headroom: Leave enough headroom (typically around -6dB) to allow for mastering adjustments.
- Avoid Master Bus Processing: Remove any limiters or compressors from the master bus to provide a clean slate for mastering.
- Check for Clipping: Ensure there are no clipping issues in your mix.
Stages of Mastering
The mastering process involves several stages, each aimed at enhancing the final sound:
- Equalization (EQ): Start by using an EQ to balance the frequency spectrum. Cut problematic frequencies and boost areas that need enhancement.
- Compression: Apply compression to control the dynamics of the track. This helps to glue the mix together and add consistency.
- Limiting: Use a limiter to increase the overall loudness of the track without causing distortion. This is often the final step in the mastering chain.
- Stereo Widening: Enhance the stereo image to make the track sound wider and more immersive. Be cautious not to overdo it, as this can cause phase issues.
The Importance of Critical Listening
Critical listening is a crucial skill in mastering. Here are some tips to develop it:
- Use Reference Tracks: Compare your track to professionally mastered tracks in the same genre to gauge your progress.
- Listen on Different Systems: Test your master on various playback systems, including headphones, studio monitors, and car speakers, to ensure it translates well everywhere.
- Take Breaks: Give your ears a rest periodically to avoid fatigue and maintain objectivity.
Practical Examples
Example of Mastering in Ozone
Let's walk through a practical example using iZotope Ozone:
- Load Your Track: Import your mixed track into Ozone.
- EQ Module: Start with the EQ module to balance the frequency spectrum. Use a high-pass filter to remove any unnecessary low-end rumble and make gentle boosts or cuts to balance the overall tone.
- Dynamics Module: Apply multiband compression to control dynamics. Set the thresholds and ratios to gently compress each frequency band, ensuring a smooth dynamic range.
- Maximizer Module: Use the Maximizer to increase the track's loudness. Set the ceiling to -0.1dB to prevent clipping and adjust the threshold to achieve the desired loudness without distortion.
- Imager Module: Enhance the stereo width using the Imager. Widen the mid and high frequencies slightly to add depth and space to the mix.
- Final Check: Use the built-in reference tracks to compare your master and make any final adjustments.
Example of Mastering in FabFilter
Here's a step-by-step guide using FabFilter plugins:
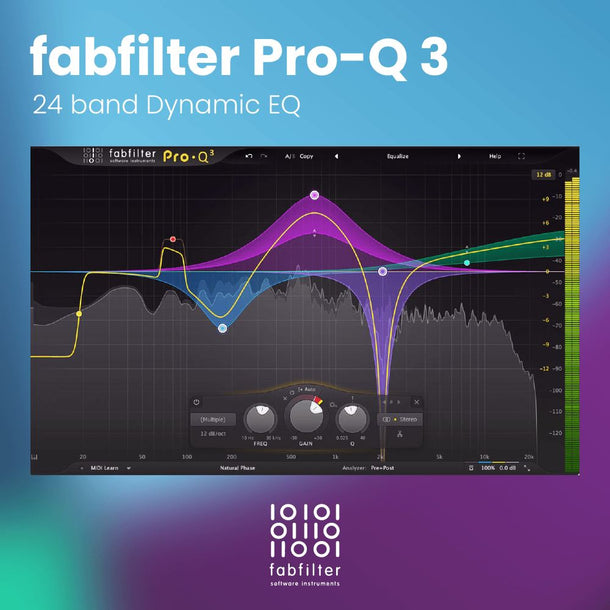 |
FabFilter Pro-Q 3 - 24 band Dynamic EQ24 band Dynamic EQ w Dolby Atmos Support. Highest possible sound quality, unrivalled interface workflow. |
- Load Your Track: Import your mixed track into your DAW and add FabFilter Pro-Q to the master channel.
- Pro-Q: Use Pro-Q to balance the frequency spectrum. Make cuts to problematic frequencies and subtle boosts where needed.
- Pro-C: Add FabFilter Pro-C for compression. Use a gentle ratio and adjust the threshold to control the dynamics without squashing the track.
- Pro-L: Insert FabFilter Pro-L for limiting. Set the output ceiling to -0.1dB and adjust the gain to achieve the desired loudness.
- Pro-MB: Use FabFilter Pro-MB for multiband compression if needed, to fine-tune specific frequency ranges.
- Check and Adjust: Listen critically and compare with reference tracks, making adjustments as necessary.
Tips for Good Mastering
Here are some practical tips to help you achieve a great master:
Don't Overdo It
Less is often more in mastering. The temptation to make dramatic changes with EQ and compression can lead to a distorted or unnatural sound. Instead, focus on subtle adjustments. For example, instead of boosting the bass by 6dB, try a 1-2dB boost and listen to the difference. Excessive EQ boosts can introduce phase issues, while heavy compression can squash the dynamics, making the track sound lifeless. Aim for balance and clarity.
Use Multiple References
Compare your track with several reference tracks in the same genre to ensure it sounds good in different contexts. Reference tracks help you maintain a professional standard and can reveal frequency imbalances or dynamic issues that you might miss otherwise. Play your track alongside your references on various sound systems—studio monitors, headphones, and even car speakers—to ensure consistency and compatibility.
Monitor at Low Levels
Mastering at low volumes can help you make more accurate adjustments and avoid ear fatigue. When you listen at high volumes, the bass and treble frequencies can be exaggerated, leading to poor decision-making. By monitoring at lower levels, you ensure that your adjustments are based on a true representation of the track's balance. This practice also reduces the risk of long-term hearing damage, which is crucial for maintaining your critical listening abilities over time.

Trust Your Ears
While visual tools like spectrum analyzers and loudness meters are helpful, your ears should always be the final judge. These tools can guide you, but they can't replace the nuanced decisions made by experienced ears. For instance, a visual tool might suggest that a frequency is too prominent, but if it sounds right in the context of the mix, trust what you hear. Regularly give your ears a break to maintain objectivity and avoid fatigue. Developing a critical listening skill takes time, so practice regularly and learn to trust your auditory judgment.
Additional Resources
To further enhance your mastering skills, consider these resources:
- Online Tutorials: In the Academy section of our website (you can reach at this address) we have a wide variety of videos for tips on track mastering
- Books: "Mastering Audio: The Art and the Science" by Bob Katz is a comprehensive guide.
- Courses: Online courses from platforms like Coursera and Udemy can provide in-depth training.
Key Takeaways for Mastering EDM Tracks
Mastering is a vital step in music production that ensures your tracks sound professional and consistent across all playback systems. We've covered the basics of what mastering is, the tools you'll need, the process, and provided practical examples using popular software.
We encourage you to experiment with mastering, try different tools, and continuously improve your skills. Join online communities, share your experiences, and learn from others.
We'd love to hear about your mastering experiments and experiences. Feel free to share your tracks and leave comments or questions on our blog. Happy mastering!


